
Siding that has cracks, holes, or warping may not always need to be replaced. There are methods of repair; learning how to repair siding without replacing might save thousands and keep the curb appeal of the house. Most people can fix common siding issues with basic tools, a close inspection, and the right techniques. Identify damage, select the right materials, and bring the siding back to its condition—all without hiring contractors—with this do-it-yourself guide. For expertise support, you can also reach out to River City Roofing.
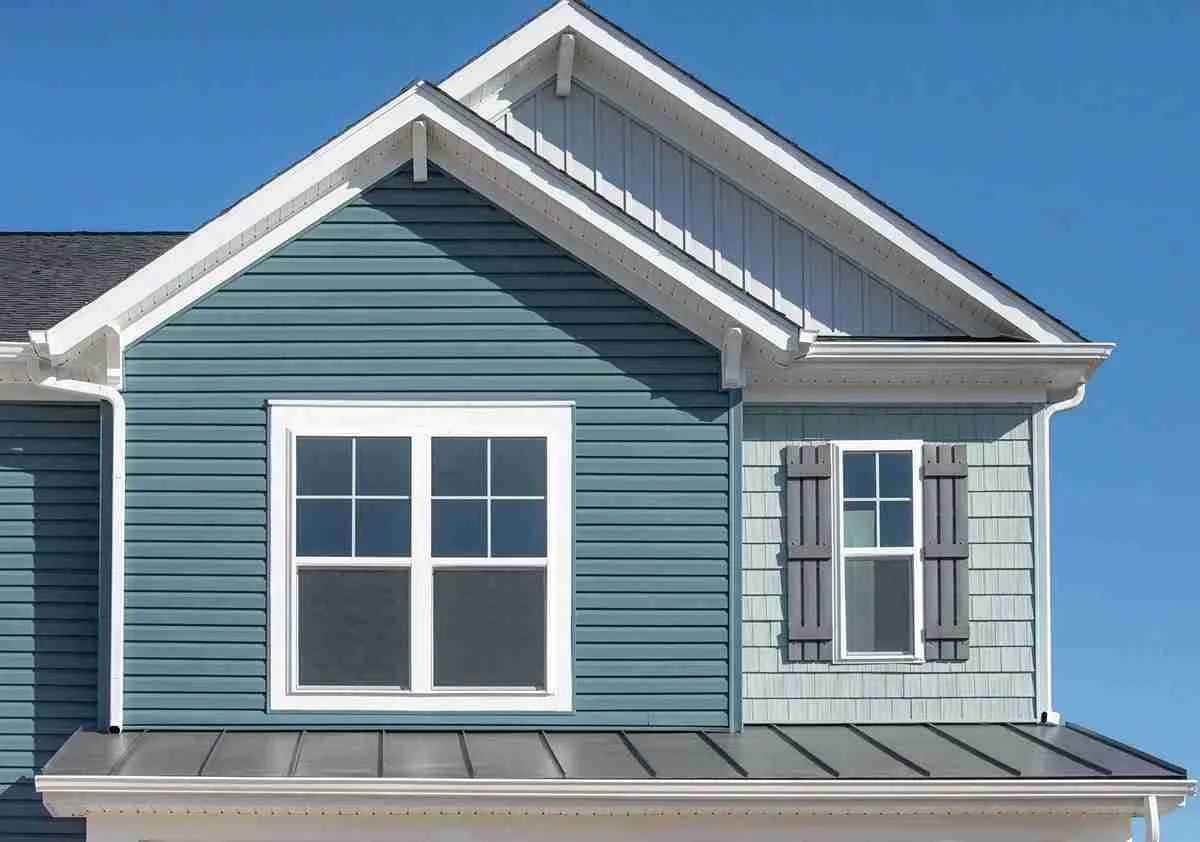
Siding Damage Assessment Prior to Repair
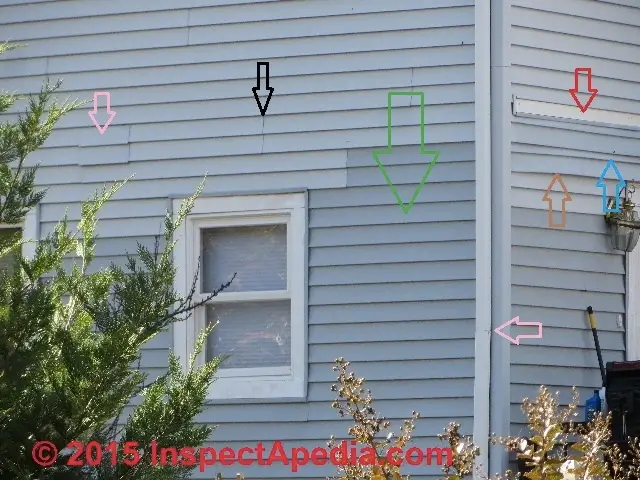
Image Source: InspectApedia
Of course siding damage is relatively minor, but thoroughly inspecting siding is important prior to repairing it. With a thorough inspection, one can best determine if a DIY solution is adequate or if a professional intervention is required.
Common signs of siding damage
Identifying problems early can prevent costly structural issues. Look for:
- Cracks or holes: Even minor openings can admit moisture into the wall, set up rot, or breed mold.
- Loose or missing panel: These gaps expose the inside structure of the house to water infiltration, as well as to pests.
- Warping or bulging associated with bubbling or rippling: frequently indicative of trapped moisture behind the siding.
- Paint symptoms: Out of the top layer of siding, indicating that the weather-resistant layer is getting older.
- Increased energy costs: damaged siding allows drafts to enter.
Moreover, mold, mildew, or fungus growing from seams typically indicates serious water infiltration issues. Water stains inside your home can likewise point to siding failures.
When repair is possible vs. when to replace
Small, isolated problems generally make good candidates for repair rather than replacement. For instance, minor cracks, dents, or isolated holes can be addressed with DIY siding repair kits.
However, replacement becomes necessary when:
- Your siding has reached its 20-50 year lifespan and shows significant deterioration
- Large sections exhibit rotting, warping, or cracking
- Moisture damage extends beyond the siding into the underlying structure
- Mold or fungus is growing extensively from seams
If damage is concentrated in one area while the rest remains in good condition, you might consider partial replacement, though color matching can be challenging with older siding.
How to inspect vinyl siding safely
Begin by walking around your house with a notepad, recording any visible issues. Pay special attention to three vulnerable areas: the base of walls (where traffic and debris impact occurs), corners, and the tops of walls.
To check the installation, simply grab the last vinyl panel by its edge away from the next one at some distance and give it a pull-it should move side to side a little. The proper vinyl siding needs to allow for contraction and expansion.
For further inspection, probe with a screwdriver any places you see are warped or spongy, especially afterward rainstorms. If the spots feel soft, they indicate rotting underneath that needs to be attended to immediately.
Your siding should be checked twice a year (in spring and fall) to catch any problems while they are still small and avoid damage to the larger structure.
Tools and Materials You’ll Need
Things needed to ensure a successful siding repair will depend squarely on the available equipment. A well-stocked toolbox will save time and deliver professional results when performing the repairs on your own.
Basic tools for siding repair
Every DIY siding repair job requires these fundamental tools:
- Pry bar: Essential for removing damaged panels without harming surrounding sections
- Utility knife: Perfect for trimming replacement pieces and cutting caulk tubes
- Hammer and nail set: Necessary for securing panels and nailing flanges
- Tape measure and carpenter’s pencil: For accurate measurements and marking
- Tin snips: Ideal for cutting vinyl or aluminum siding pieces to size
- Caulking gun: The best way to apply sealant to small holes and seams.
- Safety gear: Remember to use gloves, safety glasses, and a dust mask.
Optional tools for better results
Although not strictly necessary, these tools can dramatically improve your repair quality:
- Zip tool: Makes removing vinyl siding panels significantly easier
- Level: Ensures replacement panels align perfectly
- Heat gun: Helpful for softening vinyl during cold weather installations
- Oscillating multi-tool: Perfect for making precise cuts in tight spaces
- Color-matched touch-up paint: Helps blend repairs seamlessly
Choosing the right vinyl siding repair kit
For holes and cracks, specialized repair kits offer convenience and professional results. When selecting one, consider:
- Material compatibility: Ensure the kit matches your siding type (vinyl, aluminum, etc.)
- Color matching: Look for kits that include color-matching options or accept paint
- Size appropriateness: Choose based on damage size—patching compounds work for small holes while panel patches suit larger areas
- Weather resistance: Select kits explicitly rated for outdoor use
Most quality vinyl siding repair kits include patching material, adhesive, applicator tools, and detailed instructions. For best results, store these materials at room temperature before use, as extreme temperatures can affect adhesive performance.
Remember that investing in quality tools pays dividends through multiple repair jobs and prevents further damage that might otherwise occur using improvised alternatives.
Step-by-Step Methods to Repair Siding Without Replacing
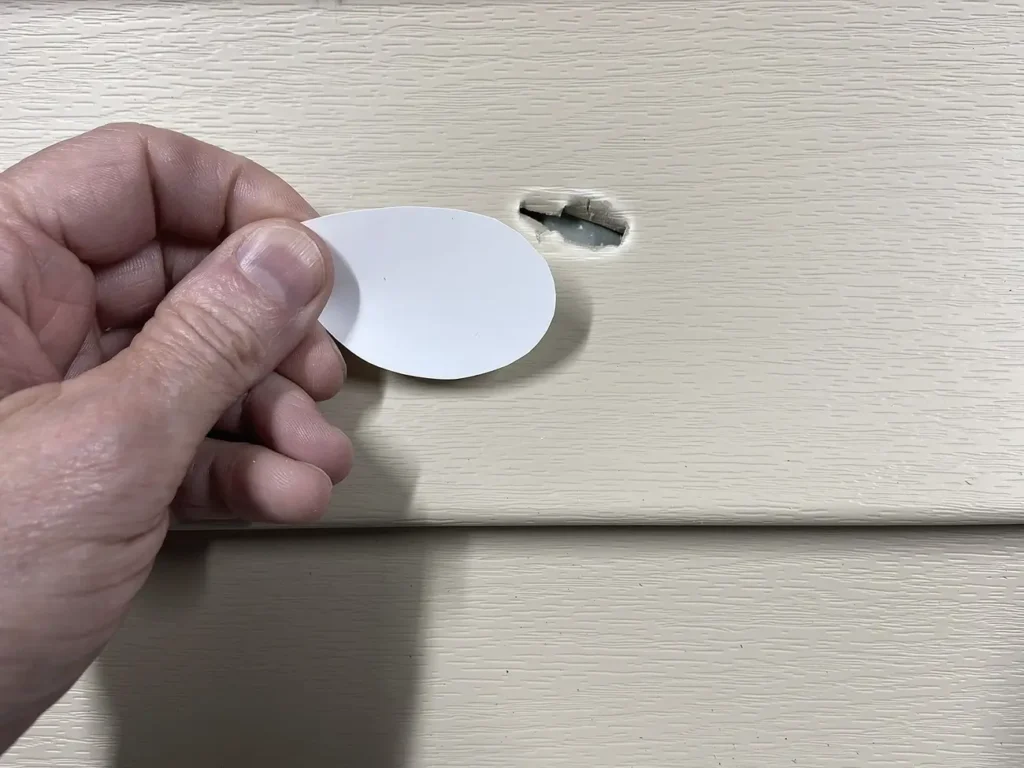
Image Source: Amazon.com
With the right techniques, repairing damaged siding yourself can be surprisingly straightforward. These step-by-step methods will help you fix common siding issues without the expense of total replacement.
How to repair a hole in vinyl siding with caulk
For small holes up to 1-inch diameter:
- Smooth rough edges around the hole using a putty knife handle
- Lightly sand the area with 220-grit sandpaper to improve adhesion
- Clean the surface thoroughly with soap and water
- Apply exterior-grade caulk or filler directly into the hole
- Overfill slightly, then smooth with a damp putty knife
- Once dry (typically 2-4 hours), sand lightly with 100-grit followed by 220-grit sandpaper
- Prime and paint to match existing siding color
How to patch medium-sized cracks or dents
For larger damage (1-2 inches):
- Insert a backer material (thin wood strip or scrap vinyl) behind the hole
- Secure it with construction adhesive or nails
- Apply exterior filler in thin layers if deeper than ¼ inch
- Allow each layer to dry completely before adding more
- Sand smooth after drying, then prime and paint
How to fix loose or warped siding panels
For warped panels:
- Carefully heat the warped area with a heat gun to soften the vinyl
- Gently reshape the panel to its original form (avoid overheating)
- Hold in position until cooled
For loose panels:
- Use a zip tool to unlock the bottom edge of the panel above
- Remove nails securing the loose panel
- Reposition the panel correctly
- Secure with galvanized siding nails in the center of nailing slots
- Leave 1/16-inch space between nail heads and siding to allow for expansion
Tips for color matching and blending repairs
- Bring a sample of your siding to a paint store for precise color matching
- Test paint in natural daylight against your existing siding
- Consider painting just the repaired panel initially
- For noticeably different colors, paint the entire wall section for uniformity
- Choose paint specifically formulated for vinyl siding to prevent peeling
- Apply in thin coats to allow the texture pattern to show through
Remember that vinyl siding fades over time, so exact matches with new materials can be challenging. Paint applied to patches may initially appear glossier but will weather to blend better with surrounding panels.
Cleaning and Final Touch Periodic Maintenance
The last finishing touch to the siding repair ensures that your structure stands the test of time and will never suffer with damage as it did previously. After completing the repair work, maintenance practices then protect your investment and give that precious home outside the necessary look it deserves.
Sanding and painting repaired areas
After the repair is finally dry, smooth the edges of old and new surfaces using sandpaper of 220 grit. For wood siding, start with coarser 100-grit sandpaper and then work gradually to finer grits. When choosing paint, choose high-standards external paints specifically manufactured for the siding materials. Therefore, the results will be more durable and resist paint peeling and chipping.
Before applying the paint, clean and possibly prime according to manufacturer recommendations. Multiple thin coats instead of one thick coat are also much better in that they attach better and look more natural. Bear in mind, however, that siding does fade somewhat over time, so an exact match in color may not always be possible. Sometimes it is easier to paint an entire section of wall so as to keep all uniformity.
How to prevent future siding damage
Keep proper drainage for siding longevity. Establish gutters and downspouts for indoor drainage and outdoor move of water from the house. Also, consider trimming trees and shrubs at least one foot from your siding.
Keep heat sources such as grills at least 10 feet from vinyl siding to avoid succumbing to the heat. Surprisingly, under certain heat and reflected sunlight from the energy-efficient windows, vinyl actually gets melted.
Establish flowerbeds extending about two feet from your siding to avoid damage from lawnmowers throwing around rocks or debris. Importantly, establish a close-to-schedule-qualified standard for each maintenance—record all dates, what have been done, and services hired to be organized.
Cleaning and inspecting your siding regularly
Using mild soap and water with a soft brush or sponge, at least once each year clean up your siding. Work top to bottom in sections. Work in sections from top to bottom. For vinyl siding, these commonly accepted cleaners work well for specific stains:
- Fantastik®, Murphy Oil Soap®: Effective for grease, rust, and soil
- Lestoil®: Works on crayon marks and lithium grease
- Soft Scrub®: Best for paint, pencil marks, and tar
Then conduct bi-annual inspections (spring and fall). Find tiny issues before they become big. Look for cracks, possible warping, loose panels, or signs of intruding moisture issues to remedy them immediately.
Conclusion
Repairing siding without replacing panels is not only budget-friendly but practical in extending the life of the exterior surfaces of your home. Filling tiny holes, fixing warped or loose panels-these generally have been easy repairs that most homeowners would master with simple tools and guidance. The best defense against major repair down the line would be the regular schedule of inspection and maintenance. With this step-by-step guide at hand, you have learned enough to be confident about keeping your siding beautiful and functional while saving time and costs in the process. In making their services available to homeowners, River City Roofing serves as a point of contact for professional assistance.
Whether you’ve patched a small hole with caulk or swapped out a damaged panel, the final touches achieve the intended result. Therefore, take the time to sand, prime, and paint your repairs; they’re going to have an effect on oil blending with the rest of the siding. Although impossible to match colors perfectly with old siding, techniques can be effectively used to yield a uniform look that is nothing but protective for decades to come.
With the education garnered through this guide, therefore, the homeowner has now been equipped to interpret siding repairs as doable DIY projects rather than involving costly professional works. After all, the outside representation of a home is the biggest and costliest investment and personal pride worth maintaining by one’s own hands.
FAQs
Q1.Is it possible for me to repair the siding rather than having to replace the whole panel?
Not at all, because there is practically no saving panel replacement: small holes, dents, or cracks can be repaired without replacement panels. Simple damage on surfaces requires the application of external caulks or fillers, which must be sanded and painted. For larger problems, try patching techniques or partial-panel replacement.
Q2. What are the tools I might be using when repairing siding?
For siding repair, the basic tools are a pry bar, utility knife, hammer, nail set, tape measure, tin snips, and also a caulking gun. Even a zip tool, level, heat gun, and oscillating multi-tool can be added to get better results. And gloves and safety glasses shouldn’t be forgotten as well.
Q3. How do I fix warped or loose siding panels?
Warped panels can be reshaped by softening the vinyl with a heat gun. A loose panel is one that can have its nails removed, have the panel repositioned, and have the nail secured with galvanized siding nails to allow for expansion space. Use the zip tool for unlocking any panels adjacent to one another if necessary.
Q4. What’s the best way to match repaired siding color with existing panels?
Repaired siding should be tested first in natural daylight to see the difference and give an exact color sample to the paint store. It is often best to paint the existing color in the repaired area or the entire wall section if you want a uniform look. The paint sold for use on the material type and thin coats should be employed too.
Q5. How can I prevent future siding damage?
To prevent future damage, maintain appropriate drainage from the gutters and downspouts, keep trees and shrubs away from the siding, stay away from heat sources, and establish flower beds to prevent damage from lawn mowing. Carry out inspections twice a year and clean your siding at least once a year using the right cleaning solution.