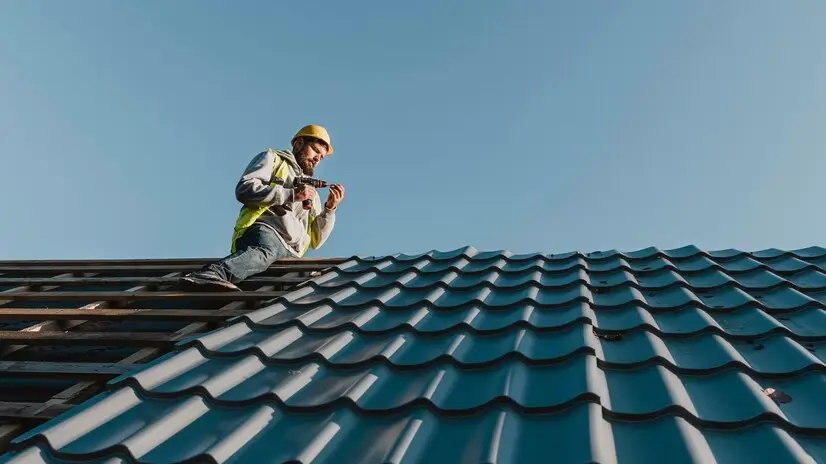
A sturdy roof is essential for any home, yet many property owners unknowingly make common roofing mistakes that can lead to costly repairs and potential damage. Improper installation of roofing components, such as solar panels, skylights, and underlayment, can result in significant issues like roof leaks and water damage. Additionally, neglecting to install or reuse a drip edge can lead to water infiltration and degradation of roofing materials, causing structural issues and costly repairs. Understanding these pitfalls is crucial for homeowners and contractors alike to ensure proper roof installation and maintenance.
This article delves into the 5 most common roofing mistakes and provides valuable insights on how to prevent them. It covers important aspects such as proper shingle selection and installation, effective weather protection strategies, and the significance of adequate ventilation and insulation. Additionally, it addresses critical issues like flashing and waterproofing failures, as well as the risks of hiring unqualified contractors. By learning about these common mistakes and roofing issues, readers will be better equipped to make informed decisions and avoid potential roof leaks and other problems in the future.
Shingle Selection and Roofing Mistakes
Choosing the Right Shingles
Selecting the appropriate roofing shingles is crucial for a durable and effective roof. Homeowners should consider factors such as climate, roof slope, and architectural style when making their choices. For optimal performance, it’s recommended to use ring roofing nails made of hot-dipped galvanized steel with a thickness of 12 gauge or more. The length of the nails depends on the thickness of the sheathing and shingles used.
Proper Shingle Alignment
Correct alignment of shingles is essential for both esthetics and functionality. To ensure even rows and accurate alignment, use a chalk line or guide. For three-tab shingles, place nails about 3/4 inch above the cutouts, near where the tab meets the upper part of the shingle. Avoid nailing into the tar strip. For architectural shingles, follow the manufacturer’s guidelines, typically placing nails through the designated line on the shingle.
Nail Placement and Length
Proper nail placement is critical for the stability and longevity of the roof. Nails should be driven straight down into the shingles, not at an angle. The head of the nail should make contact with the shingle all the way around. It’s important to avoid overdriving or underdriving nails, as this can weaken the shingle’s hold. For most situations, a 1/4-inch roofing nail is sufficient. However, if installing over existing shingles, use a longer nail that can penetrate the roofing and extend into the decking by at least 3/4 inch.
Free Roof Inspections. Fast. Reliable.
Is your roof ready to weather the storm? Dont risk property damage. Our free roof inspections provide expert analysis to identify potential issues before they become costly problems.
Ignoring Weather Protection Measures
Neglecting a proper roofing system can lead to significant roof damage and costly repairs. Integrated roofing systems are crucial in preventing issues like leaks and premature wear. Homeowners should be aware of various weather-related challenges and implement appropriate strategies to safeguard their roofs.
Ice Dam Prevention
Ice dams form when snow on the roof melts and refreezes at the edges, creating a barrier that prevents proper drainage. This can result in water seeping under shingles and into the home, causing damage to walls, ceilings, and insulation. To prevent ice dams:
- Ensure proper attic insulation and ventilation to maintain uniform roof temperatures.
- Seal air leaks between the house and attic space to prevent warm air from reaching the roof.
- Keep gutters and downspouts clear of debris to allow proper water drainage.
- Consider installing heat cables along the roof’s edge to prevent ice formation.
Wind Resistance Techniques
High winds can cause significant damage to roofs, especially in coastal areas. To improve wind resistance:
- Choose shingles rated for high wind speeds and ensure proper installation.
- Use longer nails (minimum 1-1/4 inches) to secure shingles and ensure they penetrate the roof deck.
- Install metal drip edges along rake and eave edges, fastening them securely to the roof sheathing and framing.
- Apply roof cement or self-adhering sealing strips along rake edges to bond shingles to the roof’s edge.
- Consider installing roof-to-wall attachments and gable end bracing for additional structural support.
Proper roof replacement techniques are crucial for compliance with building codes and preventing future damage.
Dealing with High Precipitation
Heavy rainfall can lead to water damage, leaks, and structural issues. To protect against high precipitation:
- Regularly inspect and clean gutters and downspouts to prevent overflow and water pooling.
- Check and maintain roof flashings and seals around vents, chimneys, and skylights.
- Replace or repair loose or missing shingles promptly to prevent water infiltration.
- Consider applying a protective roof coating for an additional layer of defence against water damage.
- Ensure proper roof ventilation to prevent moisture buildup and reduce the risk of mold growth.
Ventilation and Insulation Mistakes
Balancing Attic Ventilation
Proper attic ventilation is crucial for maintaining a healthy roof and energy-efficient home. A balanced ventilation system requires an equal distribution of intake and exhaust vents, creating a 50/50 balance between the two. This balance helps control temperature and moisture in the attic, reducing energy costs and extending the life of the roof.
Without proper balance, negative pressure can develop in the attic, pulling conditioned air from the living space through ceiling fixtures, wall cracks, and framing joints. This leads to higher heating bills and a less comfortable indoor environment. To achieve optimal airflow, the net-free area of intake venting should be equal to or greater than the exhaust venting area.
Insulation Best Practices
Selecting the right insulation type and installing it correctly is essential for maximizing energy efficiency. The EPA estimates that homeowners can save up to 15% on heating and cooling costs by properly insulating their attics, crawl spaces, and basement rim joists.
When choosing insulation, consider the following options:
- Rigid insulation boards (High-Density Polyiso Cover Boards)
- Spray foam insulation
- Fiberglass batts
- Blown-in cellulose
Each type has its advantages, and the best choice depends on factors such as climate, roof structure, and budget. For example, rigid foam insulation offers a high R-value and is recyclable, making it a popular choice for many homeowners.
Energy Efficiency Considerations
Proper insulation and ventilation work together to create a balanced system that regulates temperature and moisture levels. This combination ensures year-round comfort and energy efficiency. Some key benefits include:
- Temperature regulation: Insulation minimizes heat exchange, keeping homes warm in winter and cool in summer.
- Moisture control: Adequate ventilation prevents moisture buildup, reducing the risk of mold and mildew.
- Energy savings: A well-insulated and ventilated attic can reduce heating and cooling costs by up to 20%.
To maximize energy efficiency, it’s crucial to balance insulation and ventilation. Over-insulation without proper ventilation can trap moisture, while poor insulation can lead to energy loss. Homeowners should consult with roofing professionals to determine the best approach for their specific needs and climate conditions.
Flashing and Waterproofing Failures
Roof flashing and waterproofing are critical components in protecting a home from water damage. When these elements fail, they can lead to significant issues that compromise the integrity of the entire structure. Understanding the common failures and proper techniques for flashing and waterproofing is essential for maintaining a robust and leak-free roof. Additionally, during the installation of a new roof, it is crucial to follow proper procedures to avoid future damage and additional costs.
Critical Flashing Areas
Flashing serves as a vital barrier against water intrusion at vulnerable points on the roof. It consists of thin pieces of impervious material installed to prevent water from entering a structure through joints or as part of a weather-resistant barrier system. Critical areas for flashing include:
- Roof penetrations (chimneys, vents, skylights)
- Valleys between roof slopes
- Joints where roofing materials meet walls
- Around windows and dormers
Proper installation of flashing in these areas is crucial. For instance, step flashing is used where a roof meets a wall, with multiple pieces installed in layers alongside shingles to direct water away effectively. Counter-flashing is often employed for chimneys, utilizing two pieces of flashing to ensure water doesn’t slip behind the base flashing.
Waterproofing Techniques
Effective waterproofing is essential for long-lasting roof protection. Some key techniques include:
- Cementitious coating: Creates a waterproof seal over concrete structures, providing a durable watertight barrier.
- Bituminous membrane waterproofing: Ideal for commercial and residential roofs, offering water resistance and vapor permeability.
- Clear penetrative waterproofing treatment: Uses a transparent, penetrative chemical solution that’s non-invasive and effective for ensuring water tightness.
For concrete roofs, it’s important to apply waterproofing products, install drainage systems to prevent water puddles, and finish with a suitable paint or coating material as the top layer.
Common Leak Sources in the Roof Deck
Identifying and addressing common leak sources is crucial for maintaining a watertight roof. Some frequent culprits include:
- Damaged or improperly installed flashing, especially around chimneys and roof crickets
- Cracked housings on plastic roof vents or broken seams on metal ones
- Deteriorated sealant around flashing and roof penetrations
- Ice dams caused by improper ventilation, insulation, or clogged gutters
- Rusted or loose step flashing at the base of walls intersecting the roofline
- Tiny holes in shingles from removed satellite dishes or antenna mounting brackets
Regular inspections can help detect these issues early. Look for water stains on ceilings or walls, damaged flashing, and deteriorated sealant around roof penetrations. Addressing these problems promptly can prevent extensive water damage and costly repairs.
Hiring an Unqualified Roofing Contractor
Importance of Proper Licensing
Hiring a licensed roofing contractor is crucial for ensuring the quality and legality of your roofing project. In many states, it is illegal for roofers to operate without a proper license registered with the state. A license serves as proof that the contractor has met specific requirements and possesses the necessary skills to perform roofing work. Licensed roofing contractors are more likely to adhere to industry standards, codes, and regulations, reducing the risk of poorly executed jobs and potential legal issues.
To verify a contractor’s license, homeowners can ask for the license and registration number, which can be checked online to confirm its active status. It’s important to note that different types of licenses may govern the specific tasks a contractor is permitted to perform. Hiring an unlicensed contractor can lead to severe consequences, including fines, sanctions, and even criminal charges in some jurisdictions.
Verifying Insurance and Warranties
Ensuring that a roofing contractor has adequate insurance coverage is essential for protecting both the homeowner and the workers. Reputable roofing companies should have at least three main types of insurance:
- General Liability Insurance: This covers damage to your home or surrounding property that may occur during the roofing project.
- Workers’ Compensation Insurance: This protects both the homeowner and the contractor from financial responsibility in case of employee injuries on the job.
- Surety Bond: Also known as a contractor bond, this ensures that the customer is compensated if the contractor fails to complete the job.
Homeowners should always ask for proof of insurance and verify its validity. It’s also crucial to ensure that the contractor offers adequate warranties for both workmanship and materials. Proper warranties help protect the homeowner’s investment for years to come.
Red Flags to Watch For
When hiring a roofing contractor, be aware of these warning signs that may indicate an unqualified or unscrupulous operator:
- Door-to-door solicitation: Legitimate contractors rarely appear unsolicited, claiming to have noticed damage to your roof.
- High-pressure sales tactics: Reputable contractors understand that homeowners need time to research and plan. Be wary of those pushing for quick decisions.
- Lack of a written contract: Professional roofers provide detailed written contracts specifying the scope of work, materials, timelines, and costs.
- Requests for large upfront payments: Never pay more than one-third of the total cost upfront, and ensure payments don’t get ahead of the work completed.
- Inability to provide references or a portfolio: Qualified contractors should be able to showcase their past work and provide references from satisfied customers.
By being vigilant and thorough in the Roofing contractor selection process, homeowners can avoid the pitfalls of hiring unqualified roofers and ensure a successful roofing project.
Conclusion
To wrap up, understanding and avoiding common roofing mistakes can have a significant impact on the longevity and performance of your home’s roof. By paying attention to proper shingle selection and installation, implementing effective weather protection measures, and ensuring the roof protects adequate ventilation and insulation, homeowners can prevent many potential issues. Additionally, addressing flashing and waterproofing failures and choosing qualified contractors are crucial steps to maintain a robust and leak-free roof.
By keeping these key points in mind, homeowners can make informed decisions about their roofing projects and avoid costly repairs down the line. Remember, a well-maintained roof not only protects your home but also enhances its overall value and energy efficiency. Taking the time to understand these common pitfalls and how to prevent them will pay off in the long run, ensuring your roof stands strong against the elements for years to come.


