
Leaking roofs is one of the most common problems homeowners face and dealing with it can be a nightmare. However, once found, repairing it in a timely manner is essential to prevent future roof leaks through regular maintenance and inspections. A leaky roof can cause the growth of mold, water damage, and other problems if not repaired immediately. Addressing a leaky roof urgently is crucial, and practical tips on temporary solutions and long-term fixes can help prevent further damage to the home. But fixing your roof leak doesn’t always require an expert roofing contractor unless in case of serious damage.
Having the right tools, materials and a bit of know-how will help you to tackle minor leak problems. This blog is your step-by-step guide to help you identify the source of the leak, select the appropriate repair method, and fix the leak to ensure your home is always protected against adverse environmental conditions.
Before we proceed with the guide let us first identify the reasons that cause the leak.
- Cracks in roofs
- The improper slope of the roof
- Title damages
- Improper maintenance
- Moisture in roof
- Corrosion
- Aging
Since we have addressed the reasons that can cause a leak let us dig deeper into repairing these leaks in a step-by-step process.
How To Fix A Leaking Roof
Identifying the leak
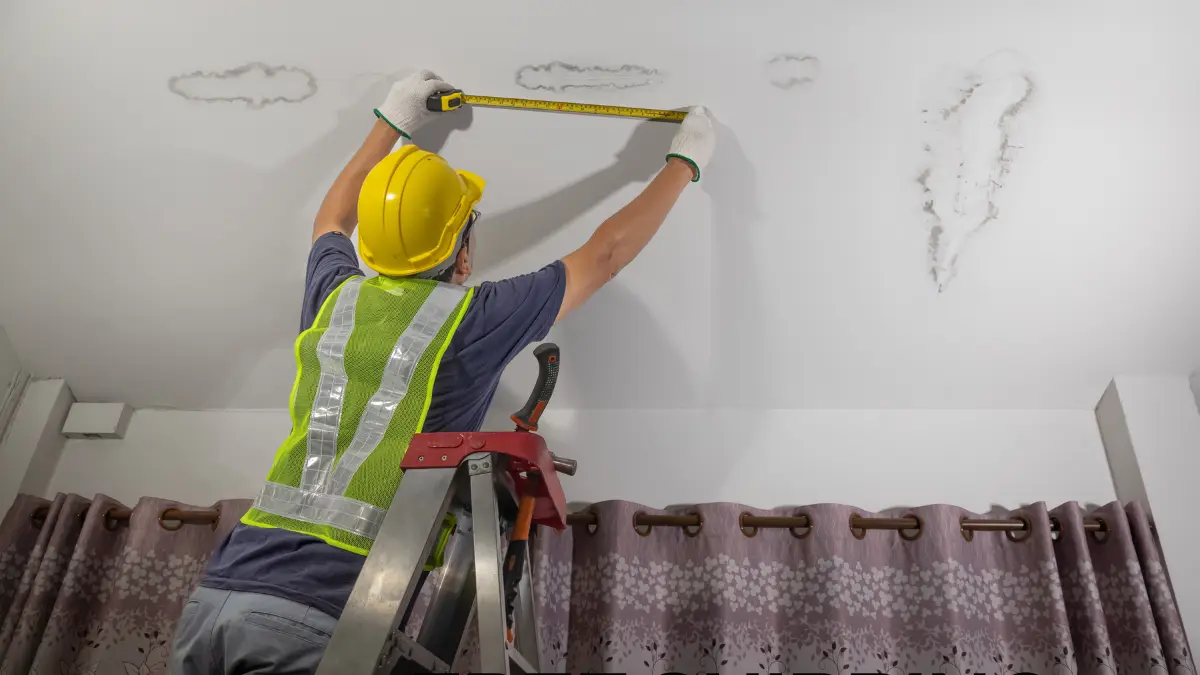
The first step to any home repair plan is diagnosis. In this case, you will have to find the exact place where the leak has originated. Sometimes it is easy to see where the leak is and get it fixed or fix it yourself. The most common places to find roof leaks include roof valleys, roofing sections, and roofing areas where usually where debris is accumulated. Flashing under your gutters, dormer windows, or along the apex of your roof. Water spots on your ceiling and wet spots around other parts of the house or the fireplace are clear signs of leaking in your roof. Regularly roof inspecting for missing or damaged shingles is crucial, as these signs of deterioration can help pinpoint the source of water infiltration.
Moving ahead with the next part of the blog which is now the guide to fix your leaking roof, we already discussed how the first step is identifying the origin of the leak and its root cause. Damages such as missing shingles or hail can allow water to seep into the roof deck, leading to significant leaks and potential structural damage.
Once you identify the leak, let us gather some tools
Assemble essential tools
Moving to the next part, let us discuss some essential tools you will need for essential repairs around your rooms, especially any leaks.
- Hammer
- Flashlight
- Flat pry bar
- Circular Saw
- Tape measure
Roof sealant can be used as a temporary solution in roofing repairs.
These are some of the basic tools that should be kept handy for any emergency repairs. However, the following are some of the materials you will need for repairing roof leaks. The materials you will need will vary depending on the type of roofing you have or the roof repair cost and the extent of damage. Some common materials include; roofing tape, roofing cement, nails, replacement shingles, shingles cutters; etc.
Roof sheathing is crucial for repairing plumbing stacks and improving sealing against moisture intrusion.
Examine roof vents
No matter where the leak is it is coming from the vent of the roof so once you know where the leak is, examine the roof vent to further analyze the situation and the gravity of the problem. If the vent is too damaged or ruined, it is better to call a roof repair expert. However, sometimes it could just be a small crack, a loosened screw, dislodged vents, or any other minor problem that can be fixed by ourselves. Additionally, check the step flashing where walls meet the roofline, as improper installation or old, worn-out flashing can lead to significant leaks. Replacing damaged step flashing ensures water is channeled away effectively.
Fixing Cracked Vents for Roof Leak Repair
Step 1: Remove or fix the damaged vents
Vents with cracks or broken seams are your entry point for water leaks and your next step should be to replace them. Remove or pull back and shingles covering the edges of these vents and remove the nails securing these vents. Seal the nail with a waterproof sealant. After this attach a new vent by nailing it to the roof.
Step 2: Sealing this new vent
Attaching the vent with nails isn’t enough to place the vent intact. For that, apply an all-purpose waterproof sealant around the edges of the vent or on other exposed roofing nails. Selecting the right waterproof sealant will help hold the shingles in place.
Note that not every repair technique works for all roof leak problems. The above-mentioned are repairing techniques for damaged or cracked vents. Now let’s see how to fix a leak caused by plumbing vents.
Plumbing vent leaks
Step 1: Fixing the worn-out rain collar
If the cracking or worn-out condition of the plumbing vent’s rain collar (the flange around the base of the vent) is the reason for the leak, it can let water into your house. Roof decking is a crucial point in understanding how water travels within the attic, which can often complicate leak detection due to gravity’s influence on water flow. Let us go through the process of fixing it step-by-step process. First, remove any caulk that has been used to seal the existing flange, remove the existing rain collar, and slip into a new one. Apply an all-purpose waterproof sealant to the new flange to keep it intact.
Step 2: Seal the base
Leakage can occur from around the plumbing vent base plates. To say it more accurately, the metal flashing present at the base of the plumbing vent base plates, tucked under the shingles could be a cause of the leak. Hence it is important to to seal it properly. To fix the leak, pull back the shingles so that you can see the edges of the metal base. Use the best all-purpose waterproof sealant around the metal edge to seal it completely and reinstall the shingles.
Chimney Roof Leaks
Another common place to find leaks is around chimneys so it is important to seal any cracks, brakes, or leakage you find. Any leak in the chimney can create major problems later and your vents around it will start to have dark streaks. Here is what you have you have to do when you notice a leak in your chimney.
Step 1: Find cracks or gaps
Any cracks or gaps in your chimney crown should be found and sealed immediately. If you find an existing sealant to be cracked or is deteriorating, it should found and fixed immediately.
Step 2: Seal the gaps and cracks
Once you find any cracks or gaps on the crown of the chimney or around it, use an all-purpose waterproof sealant to seal the cracks or gaps.
Having said this, these aforesaid are leaks that are caused by minor issues mostly like gaps, small cracks, or poor installation. However, it is important to know when is the right time to call an expert roof contractor. Even after you have sealed all the leaks, if the leak continues, you better contact an expert to inspect your home for the root cause of it.