Winter is associated with strong winds, snow, and ice, which put considerable pressure on your roof during this period, especially when cold weather sets in. One of the best ways to eliminate the damage associated with the severe winter weather is to make sure that your roof is ready for the winter. In simple terms, if you are not ready to brace for the cold winter, then your roof may result in leaks, structural damage, and expensive repairs.
In this guide, we will explore comprehensive steps on how to prepare your roof for winter, helping you answer the essential question – can your roof handle the winter?
Why Prepare Your Roof for Winter?
Let’s start with the rationale for winterizing your roof, as this process is critical. Roofs are designed to shield your home from external elements, and during winter, they face a unique set of challenges, including:
- Heavy snowfall: Because snow masses add more pressure and weight onto your roofing system, it will either succumb to damages or compromise its structural integrity if it cannot handle the loads brought by the snow masses.
- Ice dams: Ice dams occur when the snow melts and then refreezes at the edges of your roof’s surface. For this reason, these ice formations can interfere with the natural flow of water, and water will then pool, forming leaks that can lead to water damage in your home.
- Freezing temperatures: Temperature changes expose rooftops to changes in size and shape, hence cracking and allowing water to enter. In simple terms, if you are not ready to brace for the cold winter, then your roof may result in leaks, structural damage, and costly repairs.
To avert these risks, it is necessary to know how to prepare a roof for winter. Here are some useful tips that will help you make sure that your roof stays strong and functional in the cold season.
Free Roof Inspections. Fast. Reliable.
Is your roof ready to weather the storm? Dont risk property damage. Our free roof inspections provide expert analysis to identify potential issues before they become costly problems.
Tips to Prepare Your Roof for Winter
1. Conduct a Roof Inspection
The very first process that should be taken in the winterization process is a roof assessment. If you rely on personal inspection or enlist the help of a professional, the goal is to spot any compromised areas or active damage that may become magnified in the winter.
DIY Roof Inspection Tips
Check for missing or damaged roof shingles: Roof shingles are actually the initial shield of your roof against snow, ice, and wind. Shingles that are missing, cracked or curled should be replaced without any delay to avoid leakage.
Look for sagging areas: Sagging roofs are typically signs of water damage or structural problems. These roofs may not withstand the pressure exerted by the snow, and therefore, they should be tended to before the cold winter.
Inspect the flashings: Flashings are the metal pieces used for sealing spaces around chimneys, vents, and skylights. If they become bent or rusty, they become capable of allowing water into your home’s interior.
Check for debris buildup: All sorts of things, like leaves, branches, debris, etc., build up in the gutters, and water is forced to stagnate on the roof, thus forming leaks that complicate the overall picture.
Professional Roof Inspection
The use of a professional roofer might be essential if you are in doubt regarding your preparation for the winter season or if there are serious problems. A roofing professional will identify potential problems in your roofing system and will offer you advice on roof areas that can be reinforced to make your roof ready for winter.
2. Clean and Maintain Gutters
It is of paramount importance that your gutters are cleared and cleaned as part of preparing your roof for the winter season. Water blocked in roof gutters forms ice dams, which are dangerous structures that cause even more structural damage to your roofs and the internal structure of your house.
Steps to Clean Your Gutters
Remove debris: Remove any accumulated elements that could hinder the water flow, such as leaves, twigs or any other element. To minimize dangers, it is advised that one should use a sturdy ladder as well as gloves.
Check for damage: Check your gutters for signs of cracking or rust, and ensure that all the joints are properly fitted. A broken gutter will create a pathway through which water will freely flow and harm your roof.
Ensure proper drainage: Ensure that your downspouts are discharging water a minimum of 10 feet away from your structures’ base. If need be, they should be extended to minimize the chances of water pooling around your home.
Install Gutter Guards
The best that you can do to prepare your roof for winter and prevent the formation of blockages in the gutters is to install gutter guards. These mesh screens prevent the accumulation of leaves and other debris that may hinder the flow of rainwater and melted snow in the gutters.
3. Looking for Attic insulation and ventilation
The level of insulation and ventilation in the attic needs to be optimal so as to bring some durability that is much needed during the winter. The absence of proper insulation means there is always a loss of heat from your home, and this causes the snow on your roof to melt and eventually cause ice dams.
Attic Insulation Tips
Inspect insulation levels: Make sure the amount of insulation in your attic is enough so that there will not be more heat losses. According to Building Science Corporation, the recommended insulation level in most attics is R-38, which is about 10 to 14 inches of insulation.
Seal air leaks: Air leaks from your attic can cause uneven heating and cooling. This can lead to ice dams. Hence, you should install caulk or spray foam to the pipes and vents or chimneys to minimize gaps.
With a pen, mark all gaps around pipes, vents, and chimneys, then apply a layer of caulk or foam spray till they are appropriately sealed.
Add extra insulation if needed: If your current insulation is below standard, then consider enhancing it to increase the thermal resistance of your roof.
Ventilation Check
Proper ventilation eliminates the buildup of heat and moisture in the attic and thereby prevents the formation of ice dams and mould. Always ensure the attic has adequate ventilation so that free air circulation is allowed, especially on the roof, to prevent the melting of the snow.
4. Trim Overhanging Branches
Loose or low hanging branches on trees also endanger your roof, especially during winter. The accumulation of snow or ice on tree branches increases the probability of branches breaking and damaging your shingles, gutters, or the roof structure itself.
How to Safely Trim Branches
Use proper tools: Trim branches with a saw or pruning shears in such a way that they are well away from your roof. If the branches are considerably big, it will be wise to hire an experienced tree trimmer.
Cut branches that are too close: Tree branches should be pruned to a minimum of 10 ft away from your roof to prevent possible falling of the branches or any tree-related debris. If you remove or prune the branches, it helps cut down on roof damage, and the falling of leaves clogs the gutters.
5. Repair Roof Leaks Immediately
Watering problems such as leaks on the roof must be fixed when conducting an inspection so that they don’t persist through the winter seasons, especially before cold weather hits. Even a single pinhole can expand when exposed to snow and ice, causing water damage, mould, and structural problems.
How to Identify Roof Leaks
Look for water stains: If you notice discolourations on your ceiling or walls, there is every possibility that water is getting into your house through the roof. Look for the presence of damp, wet insulation or wooden beams in the attic.
Examine flashing and vents: Water infiltration is commonly found along the edges of a roof where there is a penetration, like a vent or chimney where the flashing has become loose or rotted.
Conduct a water test: If, for instance, you cannot detect the leak, then try spraying the roof with water through a hose.
Repairing Roof Leaks
Smaller leaks may simply be patched up with roofing cement. When you are dealing with extensive or more severe leaks, there are usually some shingles or flashing damage that need to be repaired. However, if the damage is severe, it should be left to a professional roofer to handle it.
6. Prepare for Ice Dams
An ice dam is a winter roofing issue that seems harmless but is actually dangerous and may cause significant damage to roofs, especially during winter storms. When the snow melts on a warm roof, it flows to the edges, and when it is still cold down there, it refreezes and causes an ice dam. This means water will back up under your shingles, and in some cases, it can leak into your home.
Preventing Ice Dams
Improve insulation and ventilation: From the above-stated points, proper insulation and ventilation of the attic are important to enable the roof to remain cold in order to prevent the melted snow from refreezing.
Install heat cables: There is always something referred to as a heat cable, which can be installed along the borders of the roof to tackle the problems of ice dams.
Install heat cables: Heat cables can be used along the borders of the roof to tackle the problems of ice dams. These cables simply warm up the accumulated snow and ice on your roof and direct it to flow to your gutters.
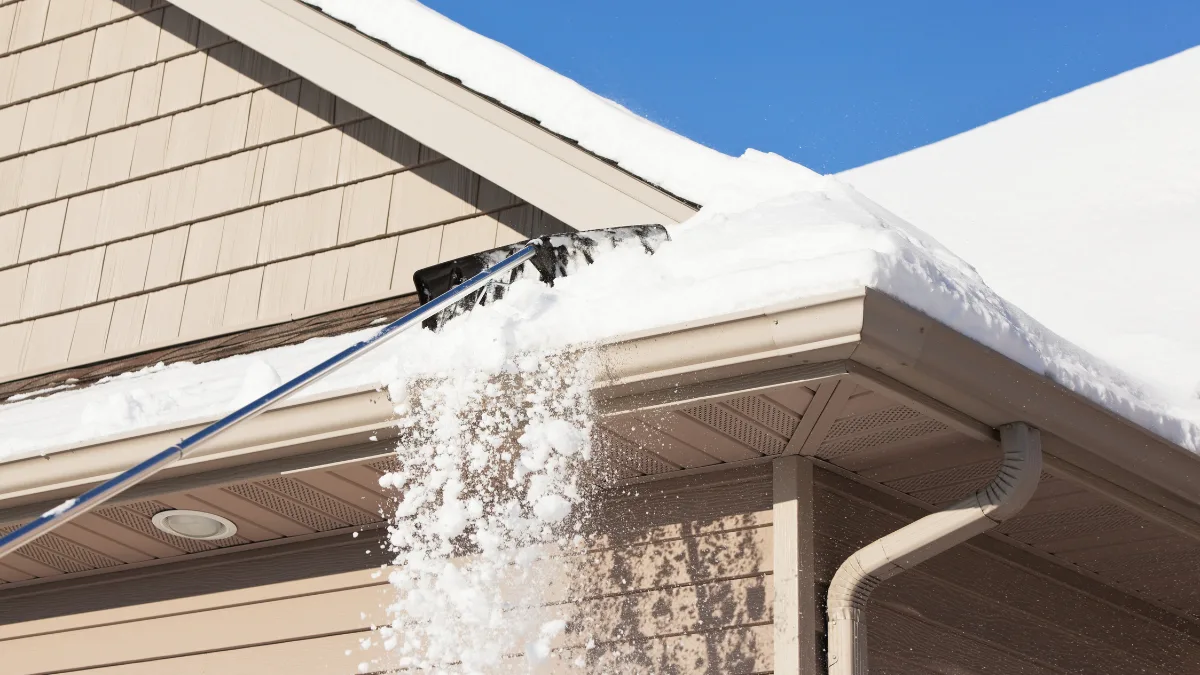
Clear snow regularly: Ensure that after a particular area has been subjected to heavy snow, the snow on the roof is removed using a roof rake. This minimizes the formation of ice dams as it eliminates the accumulation of snow on the roofs.
Dealing with Existing Ice Dams
Preventing new ice dams is one thing, but what about dealing with existing ice dams? Do not chop or hammer at the ice dam by using an ice pick or a hammer, as you will significantly harm your roofing. Instead, it’s prudent to use a calcium chloride ice melt product to melt the ice. You can also hire a professional to overcome the issue of an ice dam by safely removing it.
Schedule a Professional Roof Tune-Up
If you have not done a self-inspection, you should call a professional tune-up roofer before the winter arrives. When you hire a professional roofer, you can point out areas you did not notice, and he or she will then assess and recommend the preparations to be made to get your roof ready for the winter season.
What to Expect from a Professional Roof Tune-Up
Shingle replacement: Broken shingles that are missing from the roof will be filled to prevent the formation of any leak.
Flashing repair: Metal projections such as chimneys, vents and skylights will be fully inspected for flashing problems and corrected by the roofer.
Gutter cleaning: The roofer will also clean up the gutters and inspect them with the purpose of ensuring that their drainage is sound.
Attic inspection: A professional may also check your attic insulation and ventilation in an effort to prevent ice dams and heat loss.
Apply Roof Coating
One of the best preventive measures to protect your roof during the winter months is applying a protective roof coating. Roof coatings even provide a shield from snow, ice, and water, thus increasing the duration before such a roof is damaged by freezing temperatures.
Benefits of Roof Coating
Waterproofing: Roof coatings work in a way that makes them act as a shield against both water infiltration and penetration.
UV protection: Some of the coatings have a UV-resistant feature. This means that shingles will not crack or degrade due to sun exposure.
Improved energy efficiency: There are reflective roof coatings that make your home warmer, especially during the cold season, and thus minimize the expenses you are likely to incur on your energy bills.
Conclusion: Is Your Roof Ready for Winter?
With the help of these valuable tips about preparing the roof for the winter season, your home will be safe, efficient, and protected from the cold. From performing a thorough inspection and cleaning gutters to applying roof coatings and repairing leaks, these steps will help you answer the important question: Is your roof in the right shape for winter? You will actually save your hard-earned money since you will have fewer expenses on repair, and you’ll enjoy a warmer, safer home all winter long.
River City Roofing is here to help with all your winter prep needs! From roof inspections to gutter cleaning, our experts will make sure your home is ready for the cold months ahead. Contact us today for a free estimate and protect your roof this winter!